
Are you tired of the limitations of your stock Android ROM? Do you crave a more personalized and powerful mobile experience? This comprehensive guide will delve into the world of custom ROMs, providing you with the knowledge and tools to unleash your Android device’s true potential. We’ll cover everything from understanding the benefits and risks of installing a custom ROM, to the step-by-step process involved, ensuring a safe and successful transition. Unlock a world of customization, improved performance, and enhanced features by learning how to install a custom ROM on your Android device. Explore the possibilities of extended battery life, cutting-edge software, and a truly personalized user interface.
This guide will equip you with the essential knowledge to navigate the process confidently, whether you’re a seasoned Android enthusiast or new to the concept of custom ROMs. We will discuss key concepts such as bootloaders, recovery modes, and rooting, laying a solid foundation for a seamless installation. Prepare to transform your Android experience and take complete control of your device’s software. From backup and restore procedures to troubleshooting common issues, we’ll provide a complete roadmap to successfully install a custom ROM and optimize your Android smartphone or tablet.
Understanding the Benefits and Risks of Custom ROMs
Custom ROMs offer a compelling way to transform your Android experience. They provide enhanced features, improved performance, and the latest Android versions, often long after official support for your device ends. Customizations like themes, kernels, and performance tweaks allow you to truly personalize your device.
However, installing custom ROMs comes with inherent risks. The process can be complex and, if done incorrectly, could brick your device, rendering it unusable. Furthermore, custom ROMs may void your warranty, and some might introduce security vulnerabilities or stability issues. It’s crucial to carefully weigh these benefits and risks before proceeding.
Choosing the Right Custom ROM for Your Device
Selecting the right custom ROM is crucial for a positive experience. Compatibility is the most important factor. Ensure the ROM is specifically built for your device’s exact model number. Using an incompatible ROM can lead to a bricked device.
Consider your priorities. Do you value stability, performance, or battery life? Some ROMs prioritize stability, offering a near-stock Android experience with bug fixes. Others focus on performance enhancements, potentially at the cost of battery life. Read reviews and forum discussions to understand the strengths and weaknesses of different ROMs.
Community support is essential. A vibrant community provides troubleshooting assistance, regular updates, and bug fixes. Check the ROM’s dedicated forum or XDA Developers thread for activity and responsiveness.
Think about the features you want. Some ROMs offer extensive customization options, theming, and added functionalities. Consider whether these features align with your needs and preferences. A minimalist ROM might be a better choice if you prefer a clean and simple interface.
Backing Up Your Data Before You Begin
Before embarking on the custom ROM installation process, creating a comprehensive backup of your existing data is crucial. Installing a custom ROM often involves wiping your device’s internal storage, which means losing all your data if you haven’t backed it up.
There are several methods to back up your Android device:
- Built-in Backup Features: Most Android devices offer built-in backup options, often linked to your Google account. These typically back up system settings, app data, and some media files.
- Manufacturer-Specific Tools: Some manufacturers provide their own backup tools or software. Check your device’s documentation for more information.
- Third-Party Backup Applications: Numerous third-party apps specialize in device backups, offering more granular control over what gets backed up.
Consider backing up your data to multiple locations, such as cloud storage and an external storage device, for added security.
Remember to back up essential items such as contacts, photos, videos, documents, and app data. Once you have a secure backup, you can proceed with the custom ROM installation with greater peace of mind.
Unlocking Your Bootloader: A Necessary Step
Unlocking your bootloader is a crucial prerequisite for installing a custom ROM. The bootloader is a program that loads the operating system when you power on your device. A locked bootloader restricts you to the manufacturer’s approved operating system. Unlocking it allows you to install custom software, including custom ROMs and recoveries.
The process for unlocking your bootloader varies significantly depending on the manufacturer and model of your Android device. Some manufacturers provide official unlocking tools and instructions, while others require more complex methods. Carefully research the specific unlocking procedure for your particular device to avoid any potential issues.
Be aware that unlocking your bootloader will typically erase all data on your device. This makes the data backup step mentioned earlier absolutely essential.
It is important to note that unlocking your bootloader might void your device’s warranty. Proceed with caution and understand the implications before you begin.
Installing a Custom Recovery: TWRP or CWM
A custom recovery is essential for installing custom ROMs. Think of it as a specialized boot mode that allows you to flash custom firmware and perform advanced operations. The two most popular options are Team Win Recovery Project (TWRP) and ClockworkMod Recovery (CWM).
TWRP is generally preferred for its touch-based interface and user-friendly design. It offers intuitive navigation for flashing ROMs, backing up data, and performing other maintenance tasks.
CWM, while older, remains a reliable option. It relies on physical buttons for navigation, which can be less convenient for some users. However, CWM is known for its stability and compatibility with a wide range of devices.
The installation process for both TWRP and CWM typically involves using platform-specific tools like fastboot or Odin, depending on your device’s manufacturer. Specific instructions will vary depending on your phone model, so carefully research the proper procedure for your device.
Downloading and Flashing the Custom ROM
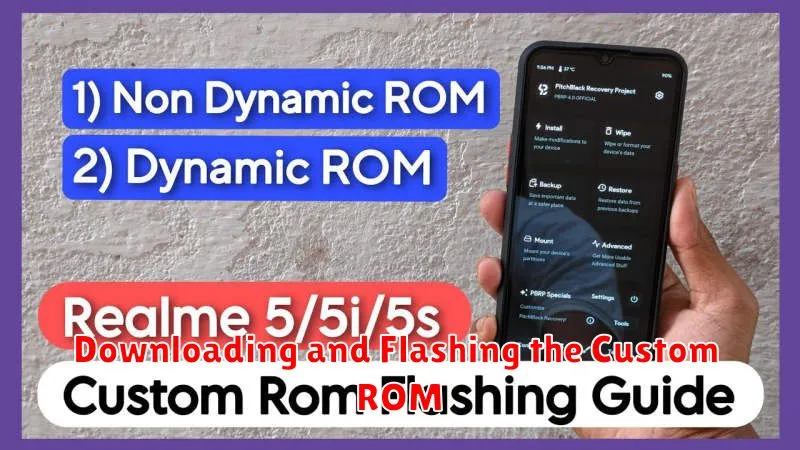
Once you’ve backed up your data and unlocked your bootloader, the next step is downloading the custom ROM itself. Carefully select a ROM compatible with your specific device model. Downloading from reputable sources is crucial for security and stability.
After downloading the ROM, you’ll likely need Google Apps (GApps) if the ROM doesn’t include them. Download the correct GApps package for your Android version.
Next, transfer both the ROM and GApps files to your device’s internal storage or SD card. This is typically done via a USB cable.
Flashing the ROM involves booting your device into recovery mode. The process for entering recovery mode varies by device, but often involves a combination of button presses while powering on. Within recovery mode, you’ll navigate using the volume and power buttons.
From the recovery menu, select “Install” or “Apply update.” Then, navigate to the location where you stored the ROM file and select it. Follow the same process for the GApps package (if applicable). After the installation process completes, select “Reboot system now.”
Troubleshooting Common Installation Issues
Encountering problems during or after installing a custom ROM is not uncommon. This section outlines some frequent issues and their solutions.
Bootloop
If your device is stuck in a continuous boot cycle (bootloop), ensure you’ve wiped the cache and dalvik cache before flashing the ROM. If the problem persists, try reflashing the ROM and GApps packages. A corrupted download can also cause bootloops, so redownload the ROM if necessary.
Status 7 Error
A Status 7 error usually signifies an incompatibility between the ROM and your device. Double-check ROM compatibility on the developer’s forum or website. Make sure you are using the correct version for your specific device model.
Storage Issues
Insufficient storage can prevent successful installation. Verify you have enough free space on your device before flashing. Clearing the cache and dalvik cache, uninstalling unnecessary apps, and moving data to external storage can create needed space.
MD5 Mismatch
This error indicates a corrupted ROM file. Redownload the ROM from a reliable source and ensure its integrity by verifying the MD5 checksum.
Essential Tips for Post-Installation Optimization
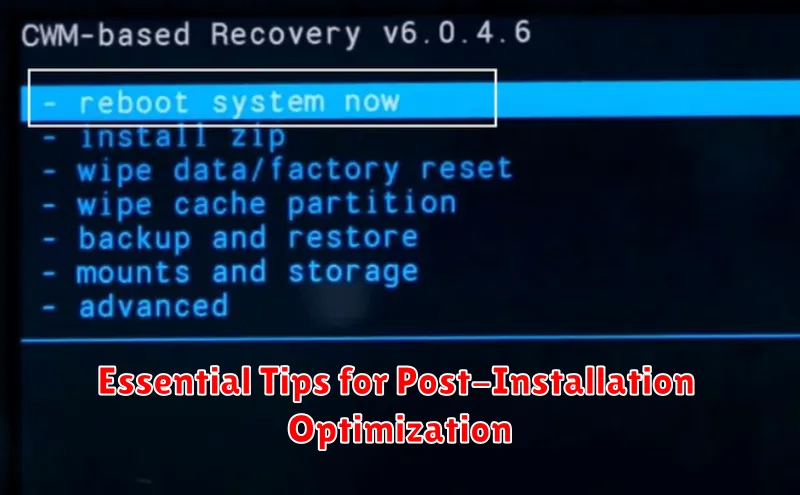
After successfully installing a custom ROM, optimizing its performance and stability is crucial. Here are some key tips to enhance your post-installation experience:
Initial Setup and Configuration
First Boot: Allow ample time for the first boot, as it can take longer than usual. The system is setting up configurations and optimizing apps in the background.
Google Account Setup: Carefully enter your Google account credentials to restore your backed-up data and access essential services.
Essential Apps: Install only the apps you frequently use. A clean app drawer can significantly improve performance.
Battery Optimization
Battery Calibration: Consider calibrating the battery after flashing a new ROM. While some modern batteries may not require calibration, it can resolve inaccurate battery readings for some users.
Battery Usage Monitoring: Observe battery usage patterns within the ROM’s settings to identify and manage power-hungry apps.
System Maintenance
Regular Updates: Check for ROM updates and install them to benefit from the latest features, performance improvements, and bug fixes.
Cache Clearing: Periodically clearing the cache partition can help maintain system responsiveness and prevent performance slowdowns.
Exploring the World of Custom ROMs and Add-ons
The world of custom ROMs extends beyond just the core operating system. A rich ecosystem of add-ons and modifications exists, allowing for further customization and enhancement of your Android experience. These add-ons can range from simple visual tweaks to performance enhancements and entirely new features.
GApps (Google Apps): Many custom ROMs come without Google’s proprietary applications. GApps packages can be flashed separately to add functionalities like the Google Play Store, Gmail, and Maps.
Kernels: The kernel is the core of your operating system, responsible for managing the system’s resources. Custom kernels offer potential performance improvements, battery life optimization, and access to advanced features.
Magisk Modules: Magisk is a popular rooting solution that also offers a modular system. Magisk modules allow you to add specific functionalities or tweaks without directly modifying the system partition, offering greater flexibility and safety.
Custom Themes and Launchers: Personalize your device’s look and feel with custom themes and launchers. These can alter everything from icons and wallpapers to animations and the overall user interface.